All crafters know that inventory (what you paid for raw materials waiting to become "creations" AND already in "creations" ready to sell) is either a jumble of "stuff" stored in dozens of little compartments in numerous drawers or hundreds of little baggies in numerous drawers. In my case, I've got thousands of beads. And don't forget the coils of sterling, gold-fill & copper wire, all in various gauges.


Finally, imagine that you bought some of the same components like beads & gauges of wire several times from multiple sources at different costs. Given the hundreds & hundreds of tiny beads & yards of different wire purchased at different costs, trying to determine the cost of the components in finished items was a nightmare!

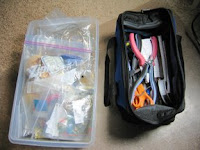
Remembering that nightmare of 2006, my first year as a business, I began fine-tuning a plan in 2007 with some success. (The picture above is the GOOD mess. You should have seen the 2006 mess!) Any crafters can use this method, provided they determine the cost paid for 1 "unit" of each material purchased. EXAMPLE: Whenever I arrive home with a stash of new beads, I whip out those receipts, calculator, some squares of scrap paper, and little baggies. I determine the cost of each bead on a strand, note that cost on a square of paper, & seal all like-strands with the cost note in a little ziplock. For new wire, I calculate the cost per inch of each coiled purchase & tape that cost onto the coil. Then whenever I make a piece of jewelry, I get a bigger square of paper to itemize the number & kinds of beads used, their per-bead cost, & the cost of x inches of each gauge of wire used in the piece. I calculate the total cost on that paper & label it with my creation's name, sealing my creation & the paper in a new baggie.
When I've made a few items, I head for the computer to add more entries into the a grid I created in Excel or Word for that tax year. For each item, I enter its ID, a thumbnail pic, the materials used, the total cost of materials used, item's measurements, and the base price, sales tax, & net price I'll charge. When my creation sells, I enter its date of sale & purchaser. (NOTE: In 2008 I added a column for city & zipcode where buyer received the item.)
 (Click any image in the blog for a close up:)
I like this method because I can easily add new items at the bottom of the grid, then have Excel or Word sort the list on the ID OR on the DATE SOLD. Not only is the list wonderful documentation at tax time, but essential at craft shows when the price tag on an item disappears or your helper needs details about the stones in a piece.
I hope this concept helps another newbie out there, regardless of the craft. I'm no tax guru or accountant, but this grid each year, supported by hundreds of humble little scraps of paper, is the basis for the toughest part of my bookkeeping -- Inventory & Cost of Goods Sold.
OR
You can dump the ziplocks on your accountant's desk & go home to a good book... which sounds really sweet to me right now!